Stop Mac OS X from Requiring a Repeat of User Name
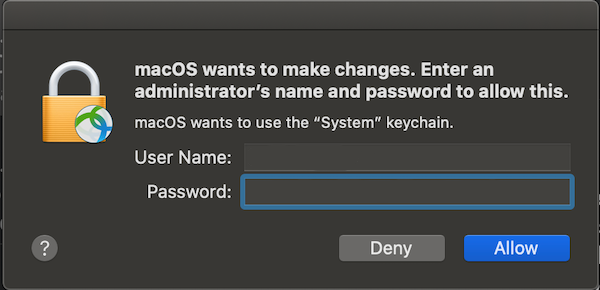
Ever since moving to a new college-controlled VPN client, Cisco AnyConnect, for VPN access on August 1, 2020, I’ve had to repeatedly enter both my username and system password every time I launch a VPN connection. The annoying prompt/dialog looked like this:
Fortunately, I found this post and answer explaining how to enable Keychain Access without having to repeat the User Name twice each time. The suggested process is this:
Launch /Applications/Utilities/Keychain Access
• Select “System” from the Keychains menu in the upper left
• Select “Certificates” from the Category menu in the lower left
• Find the entry that corelates to your computer’s name in the list on the right, and click on the disclosure triangle.
• Secondary click on the “Private Key” entry that appears and select “Get Info” from the contextual menu that appears.
• Select the Access Control tab.
• You can then either add AnyConnect to the the list at the bottom of the screen (more secure, but you will need to repeat this process anytime the version of AnyConnect changes), or toggle the radio button to “Allow all applications to access this item”.
Note that I chose to add AnyConnect to my list of allowed apps, so presumably I’ll need to repeat this change every time that a new version of Cisco AnyConnect is installed.
And that’s a wrap. Until next time…