Creating Better Documentation
We Need More Cow Bell Screen Capture!
On a recent project I found myself following some development guidance provided in Deploying an 11ty Site to Azure Static Web Apps and I really like the work that squalrus did here because there’s a nice mix of screen capture images and descriptive text. I think my documentation, at least in the past, has been lacking in images. Time to fix that.
Command - Shift - 5
On my Mac I frequently use the command - shift - 5 key sequence to launch dynamic – think movie, not image – screen capture. I did just that moments ago, so some of what you’ll see below is a result of that maneuver. 😄
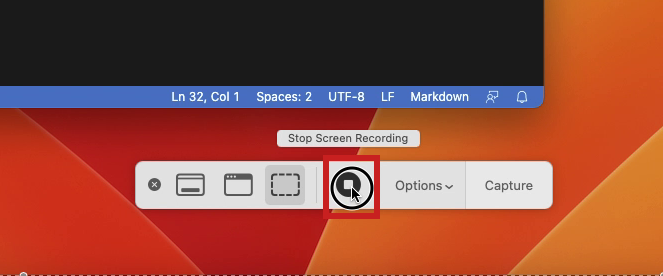
So, now when I begin a new bit of development I use command - shift - 5 to open a capture control like you see in the image below, and I capture every keystroke, command, and click as I work. When finished I use command - shift - 5 again to re-open the control, click stop (the square block control shown in the figure below), and presto, I have a new .mov file captured and ready for edting.
Convert Videos to Frames
Embedding a raw .mov file into my documenation is possible, but more often that not the files are HUGE, and they contain LOTS of unnecessary, boring minutes. All I really need is a sequence of images, perhaps with annotations, gleaned from the movie. That’s where github.com/SummittDweller/convert_videos_to_frames comes in.
The aformentioned Python code repository was forked from github.com/anas-899/convert_videos_to_frames, and I made very few changes to that excellent starting point. Honestly, all that I did was apply my preferred Python project process, namely Proper Python.
I used the tool to post-process the dynamic screen capture made while building portions of this post. Some of the images generated from that screen capture may appear below, with a bit of explanation.
Conversion Workflow
This section will walk us through the workflow I’ve developed for turing a .mov into images, and then into figure markdown like this example:

Note that while composing this document I found it’s best if image files have zero-padded numeric names, so 123.png should be 0123.png. This helps keep the images in numerical order everywhere.
I made code modifications in github.com/SummittDweller/convert_videos_to_frames to enforce this new naming convention, but some screen images in this document still appear in the old, unpadded naming convention.
1) Rename the Screen Capture
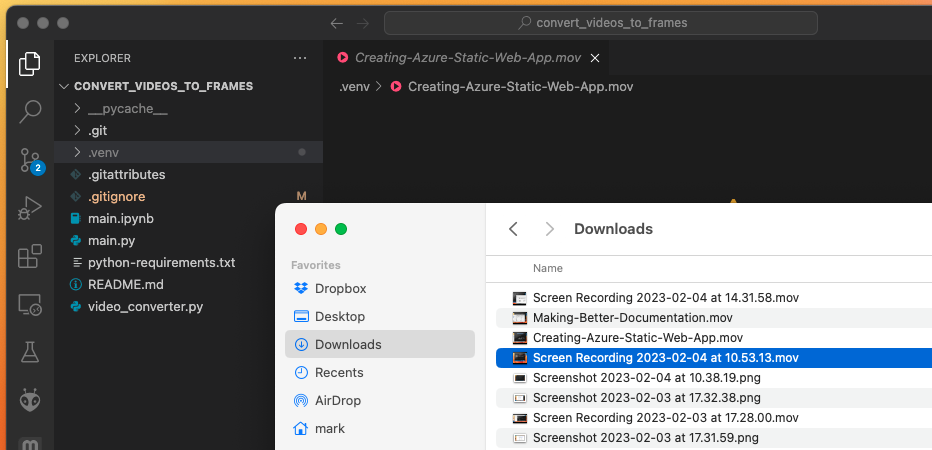
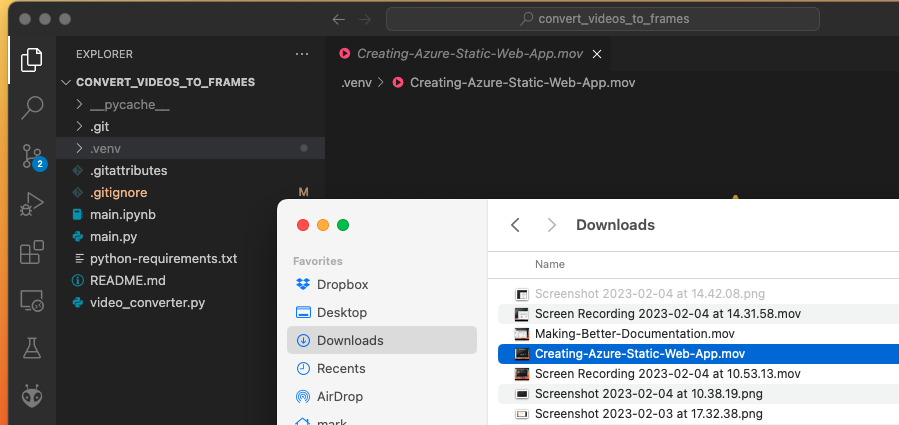
The first step is to change the screen capture .mov filename to something memorable as shown in the next two figures.
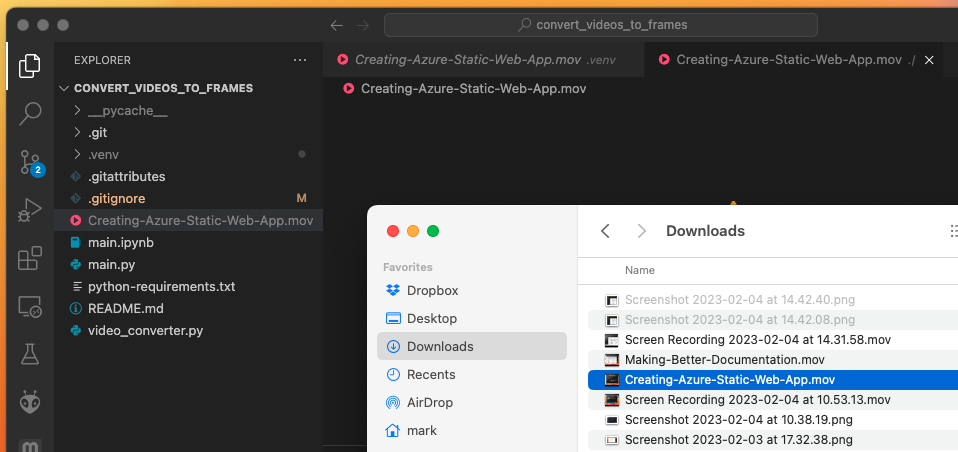
2) Drag the Renamed .mov Into VSCode
Drag the renamed .mov file into the VSCode window and the convert_to_video_frames project window as shown below.
3) Run the main.py Script
Running the main.py script using a command of the form shown below processes the specified .mov file to create a large number of .png image frames. The images are saved in a directory with the same name as the .mov file as shown in the figure below.
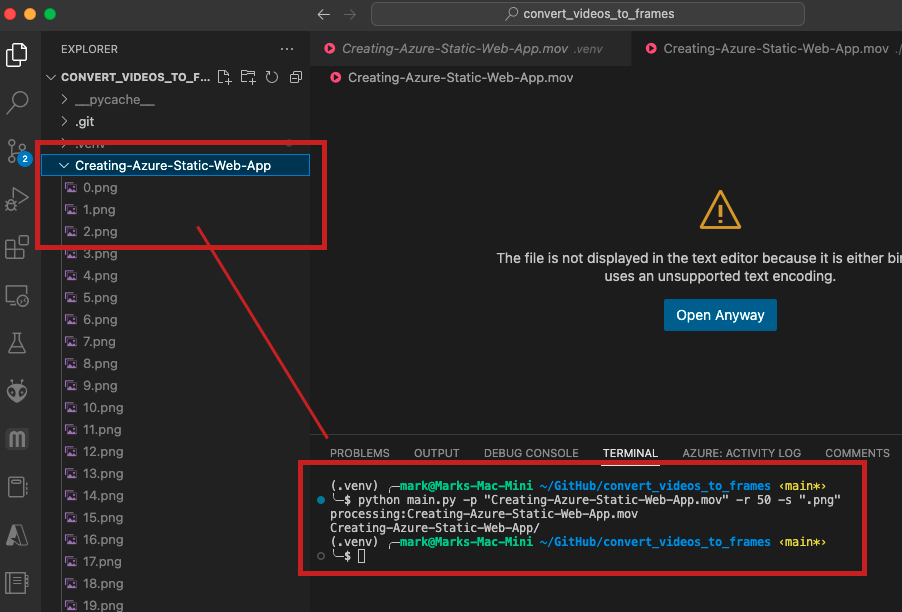
The command used in the above figure was:
python main.py -p "Creating-Azure-Static-Web-App.mov" -r 50 -s ".png"
That command syntax is documented in the convert one video section of the convert_video_to_frames project README.md file.
4) Delete Unnecessary Images and Add Annotations in VSCode
My configuration of VSCode is equipped with a simple image editor extension, so in the next step in my workflow I use that extension to browse through the images. While browsing I delete any images that I don’t need. I frequently add simple annotations – like the red boxes and lines seen in the previous figure – to those images I want to use.
Sorry, I didn’t capture any screen images from this culling and annotation process. 😦
5) Upload Necessary Images to Azure Storage
Lots of .png images should not be pushed to GitHub, so I typically push the images to Azure Storage and reference them in figure shortcodes like the one shown above in Conversion Workflow.
I’ve established a procedure that works nicely for adding a directory of images to Azure Storage. It looks something like this:
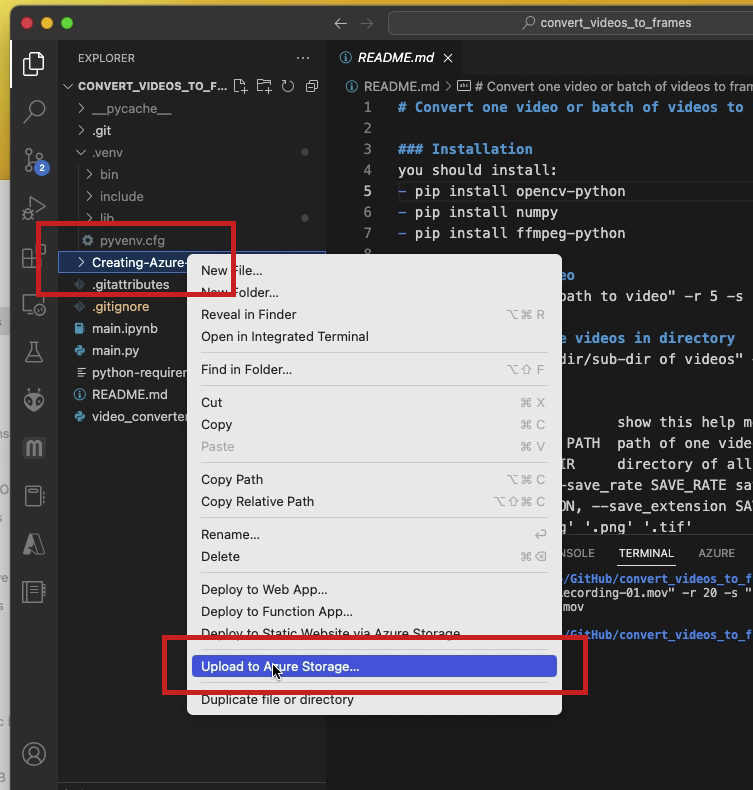
- In VSCode navigate to the directory containing necessary images, right-click on that directory name, and choose
Upload to Azure Storage...from the pop-up menu as illustrated in the figure below.
- Again in VSCode, choose a Storage Account – this is usually
sddocsfor me – from the drop-down list that appears at the top of the window.

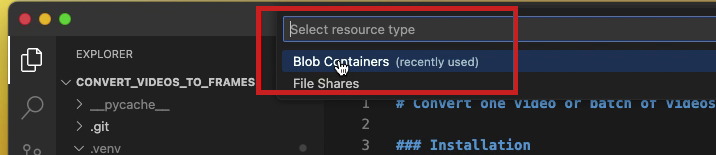
- In the
Select resource typedrop-down at the top of the window, selectBlob Containersas illustrated below.
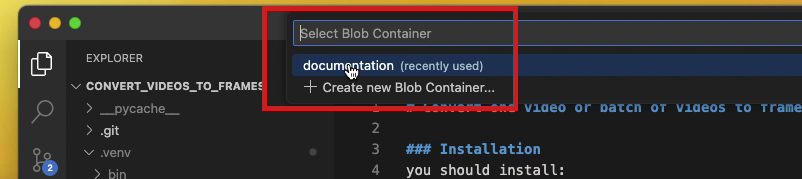
- Next, choose a Blob Container – this is usually
documentationfor me – from theSelect Blob Containerdrop-down list that appears at the top of the window as illustrated below.
- In the
Enter the destination directory...leave the/and pressEnterto select it as illustrated below. This will preserve the name of your selected local directory in Azure Storage.

- The
Azure: Activity Logscreen in VSCode should now reflect the status of the upload, and a pop-up message may appear in the lower-right corner of the window as illustrated below.
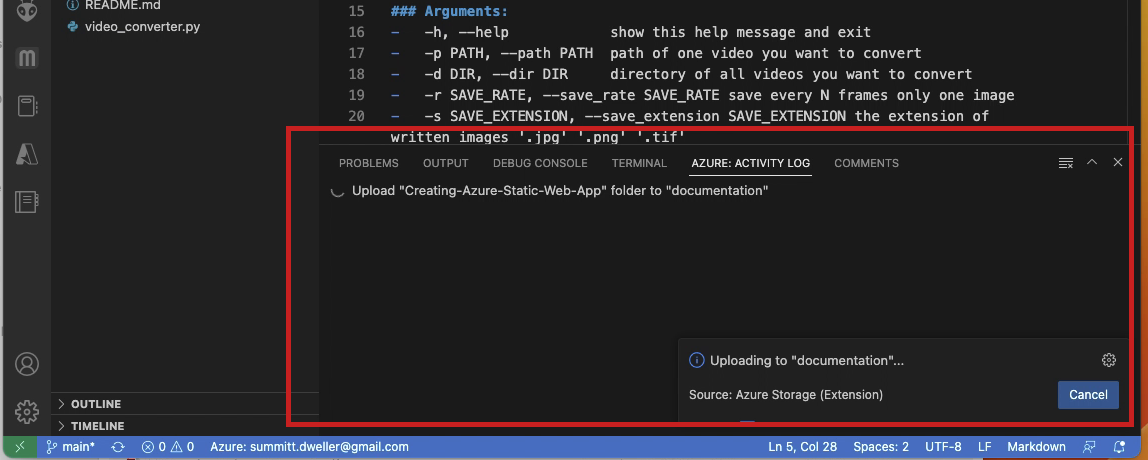
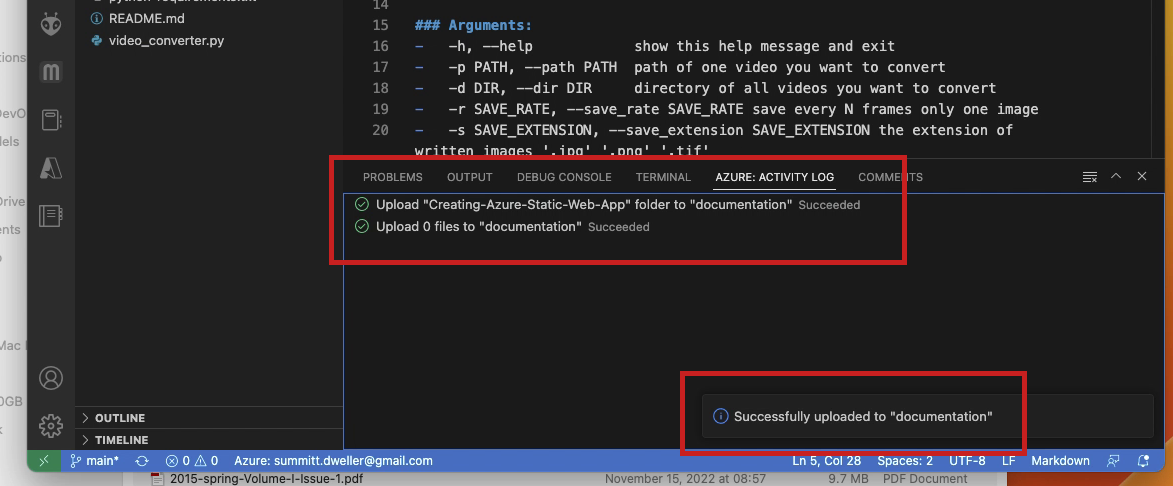
- When the upload is complete the
Azure: Activity Logscreen in VSCode should indicate this as will the pop-up message in the lower-right corner of the window.
- You can check the upload status using the
Azureextension on the left side of the VSCode window.

- In the
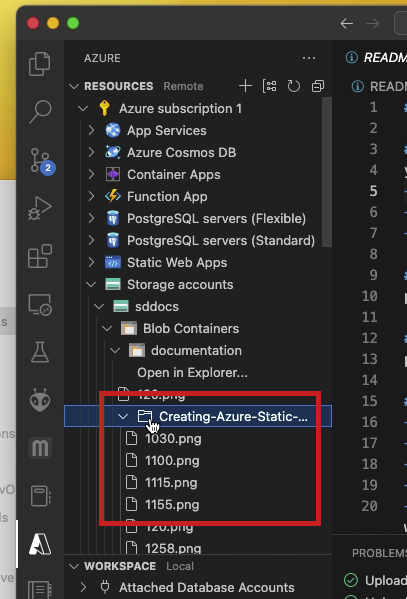
Azureextension navigation pane expand theResourceselement, the subordinatesubscriptionelement, theStorage accountselement, andBlob Container+ directory structure to find the destination directory.
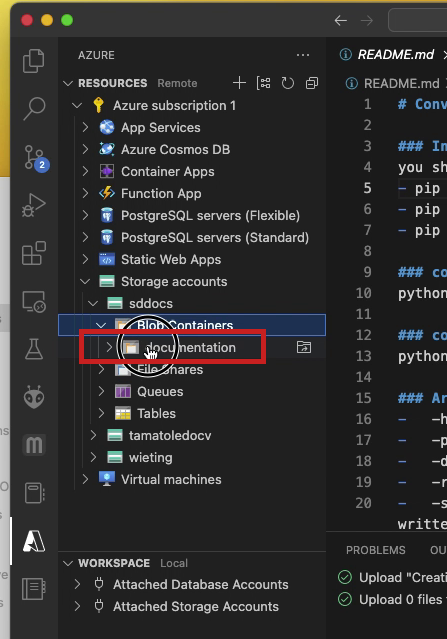
- You should be able to navigate and find the uploaded files to confirm that the upload was a success.
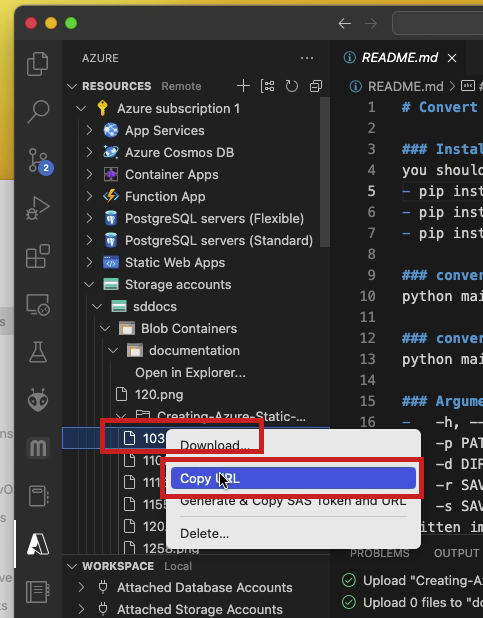
- If needed, you can retrieve the URL of the Azure resource by right-clicking on the filename and choosing the
Copy URLelement in the drop-down. Read on to understand why having the Azure URL is important!
An Even Better Approach
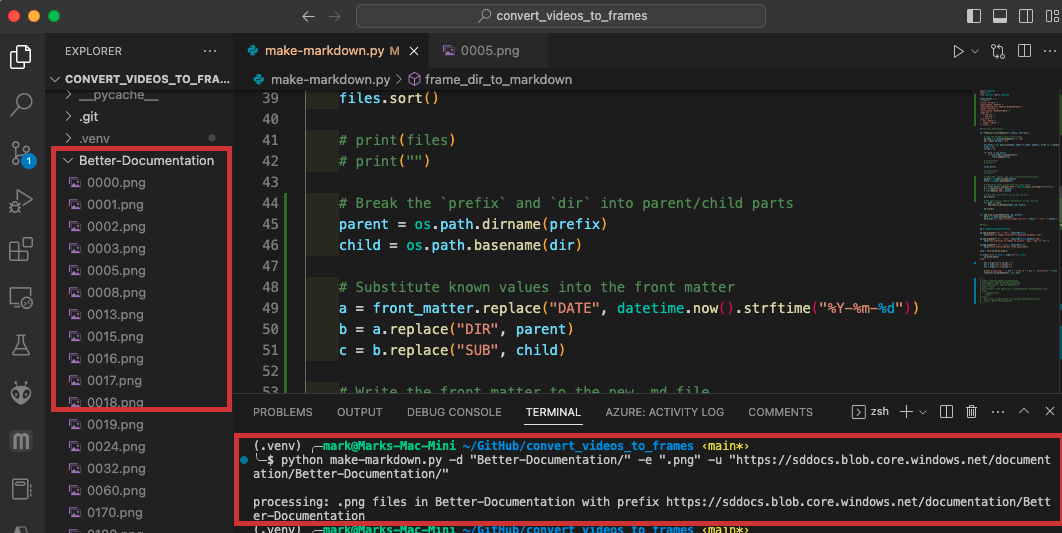
The workflow documented above seems to work very well, but really needed one big improvement before I could comfortably adopt it. Specifically, I needed a script to scan a local directory of frame images like the one shown on the left in the figure below.
make-markdown.py Added to convert_videos_to_frames
Mackenzie and I created the make-markdown.py Python script inside the github.com/SummittDweller/convert_videos_to_frames project. The figure below illustrates an example of running make-markdown.py on a local directory of images named Better-Documentation/. The specific command in that example was:
python make-markdown.py -d "Better-Documentation/" -e ".png" -u "https://sddocs.blob.core.windows.net/documentation/Better-Documentation/"
Running make-markdown.py with a -h or --help flag prints the script’s help text like so:
(.venv) ╭─mark@Marks-Mac-Mini ~/GitHub/convert_videos_to_frames ‹main*›
╰─$ python make-markdown.py -h

usage: make-markdown.py [-h] [-d DIR] [-e EXT] [-u URL]

options:
  -h, --help         show this help message and exit
  -d DIR, --dir DIR  path of images directory to generate markdown from
  -e EXT, --ext EXT  the extension of images to process: 'jpg', 'png' or 'tif'
  -u URL, --url URL  Azure prefix/address to be generated
make-markdown.py Output
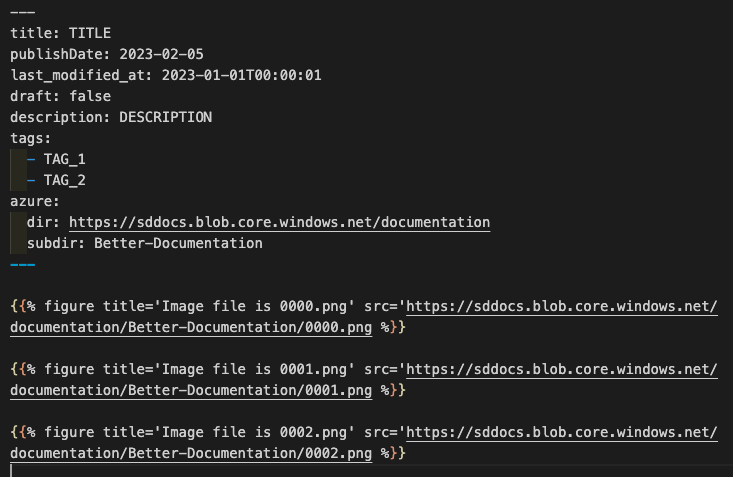
A successful run of make-markdown.py produces a .md file named after the --dir argument, the name of the frame image directory that is processed. That output .md file contains:
- YAML front matter with information about the
--dirand run, and - a list of figure references to Azure Storage objects, one line for each frame image found in
--dir.
The truncated output of the example in the figure above reads like this:
I recommend using the .md file generated by make-markdown.py as the start of your documentation! Just be sure to cull and annotate the images in your local --dir before you upload them to Azure, and before you run the make-markdown.py script.
That’s all for now folks!