Gating My Content & More - Parts 1 and 2
A Blended Approach
It’s a new month, February 2023 that is, and this the first part of follow-up to last month’s post in my personal blog, namely Gating My Content. Now, rather than trying to “gate” some of the content in the Wieting Theatre website, I’m going to start a new site, with characteristics listed below, and include only the protected portion of the Wieting’s content.
I call this a “blended” approach because it will, at least initially, leverage and blend guidance and elements from many of the resources I’ve captured at https://www.one-tab.com/page/iyQVdlpSRICO67Mue7Cb_Q.
This post originally documented the creation of an 11ty site based on the NEAT Starter Template, and some of the illustrations here may include references to it. However, after the 11ty site was created I found a starter tutorial and site template better suited to my needs. So, I have a new OneTab page which includes A Deep Dive Into Eleventy Static Site Generator with an associated starter/template that I’ll be using in place of the NEAT Starter Template.
Features
As you’ll see in the OneTab page listed above, the new site will feature:
- An 11ty site following
this NEAT Starter TemplateA Deep Dive Into Eleventy Static Site Generator, - Deployed as an Azure Static Web App,
- Customization to populate the site with Wieting Theatre Guild information,
- Using StatiCrypt CLI to protect pages,
- From a GitHub Action, and
- Perhaps some integration with Netlify CMS in Azure instead of Netlify.com.
With Better Documentation
As steps are taken, I’ll try to capture what I used, and why, along with a detailed history of those steps. In fact, I’m going to try using Creating-Better-Documentation to record everything I do on this screen from start-to-finish. Wish me luck.
This post will cover features 1 and 2 from the list above. Subsequent posts in this blog will address features 3 through 6.
In the figures below, yellow box annotations mark elements that need attention or need to be checked, while red box annotations mark elements that need input of some kind.
Building a Local 11ty Site
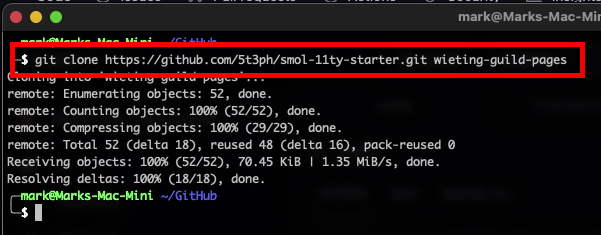
I started the build process using the NEAT Starter Template Smol-11ty-Starter to create a new local git project. See Figure 1 below.
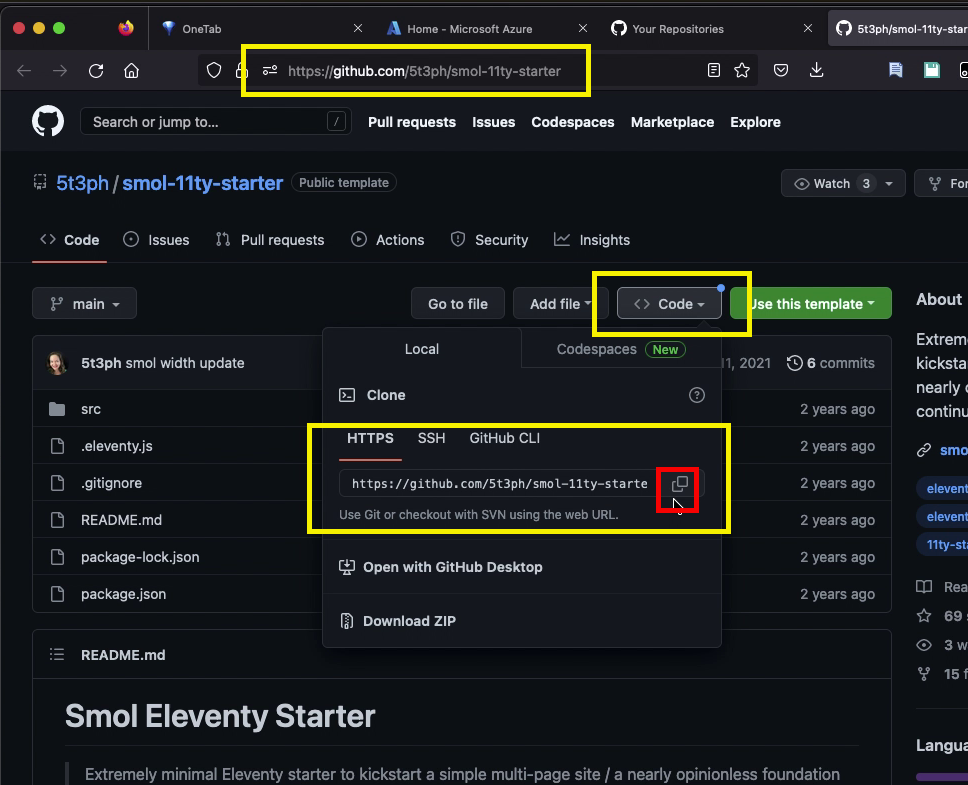
In my case, I choose to name my new project wieting-guild-pages rather than using the default name. The full command in my case was: git clone https://github.com/5t3ph/smol-11ty-starter.git wieting-guild-pages.
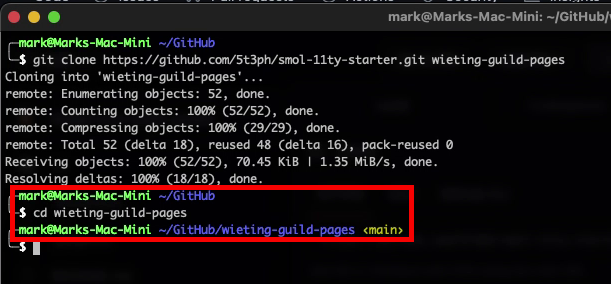
Change directory (cd) into the new project directory.
If I intended to create a public code repository I could have “forked” the Smol-11ty-Starter project and cloned my local from that fork, but the SummittDweller/wieting-guild-pages needed to be private so I used the following process instead. Why? Because you can’t create a private repo from a fork.
So, I began by removing the local repo’s association with Smol-11ty-Starter using rm -fr .git as shown in Figure 4 below.

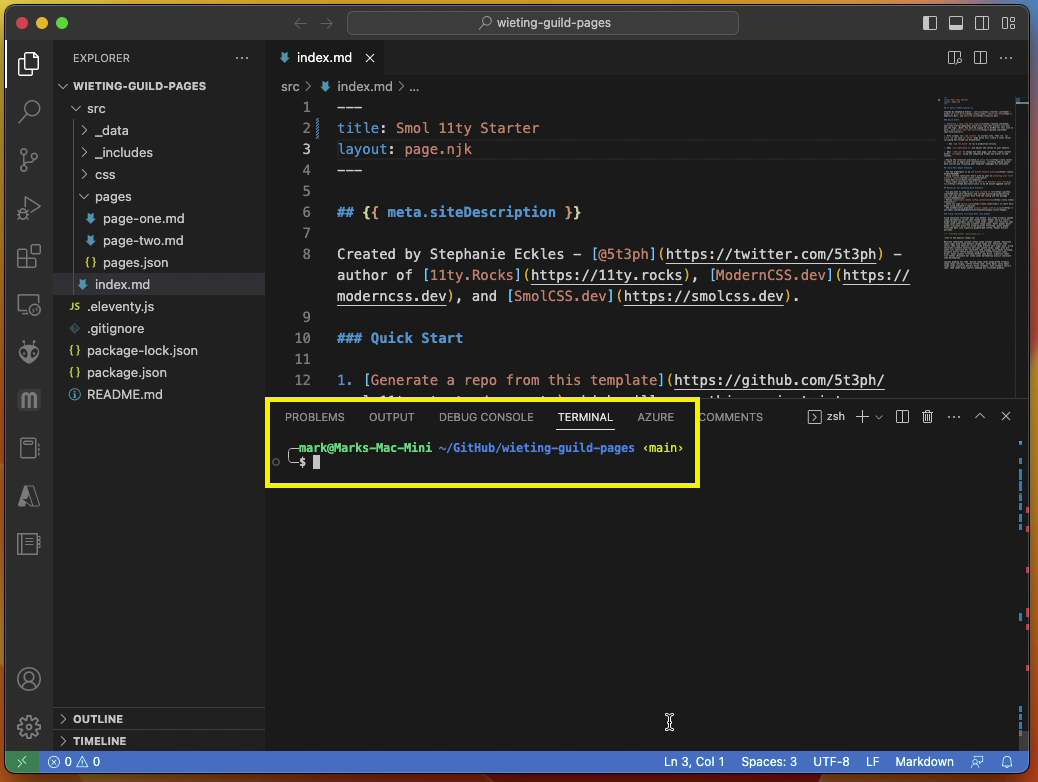
Time to launch VScode. On my Mac that’s simply: code ..

I like to have a terminal, attached to my project workspace, running inside VSCode. So, in VSCode that’s Command - Shift - P to open the command pallette, then select Terminal: Create New Terminal (In Active Workspace) to open a terminal within the VSCode project as you see below in Figure 6 and Figure 7.

Creating a New GitHub Project
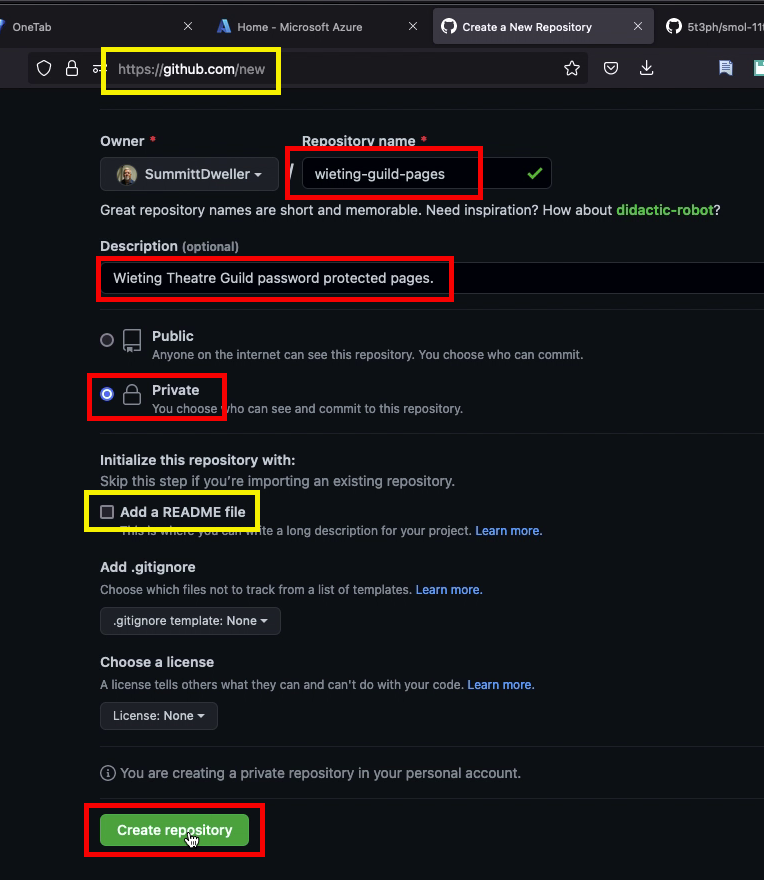
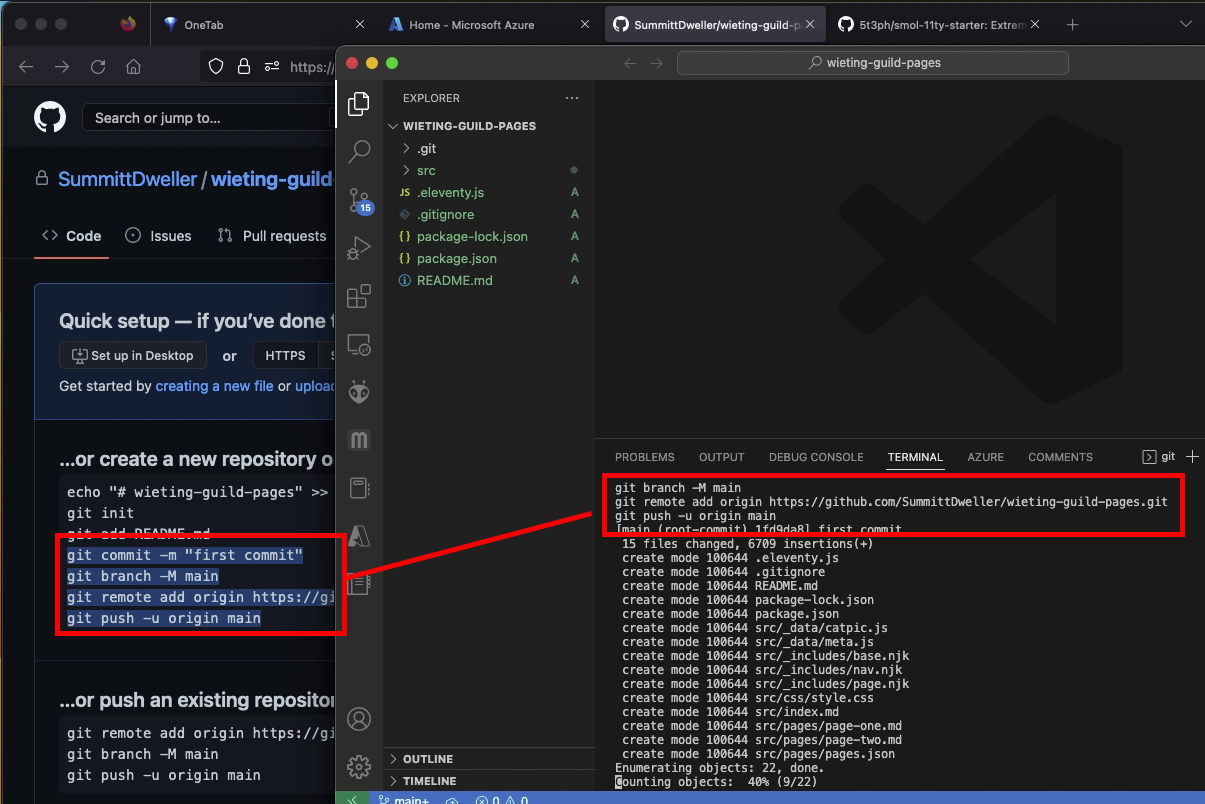
Next, I returned to my GitHub tab and select the upper-right + drop-down to create a New repository. I gave the new repo a Repository name, Description, chose to make it Private, did NOT elect to Add a README file, and clicked Create repository, as you see in Figure 7 below.
The new repo comes with instructions for proceeding with the project.
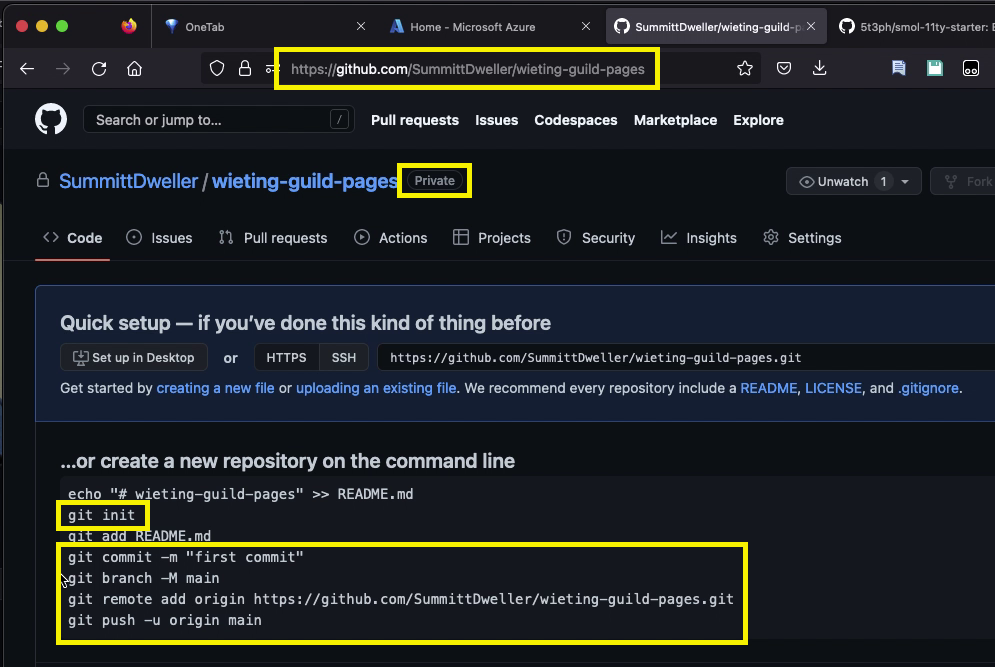
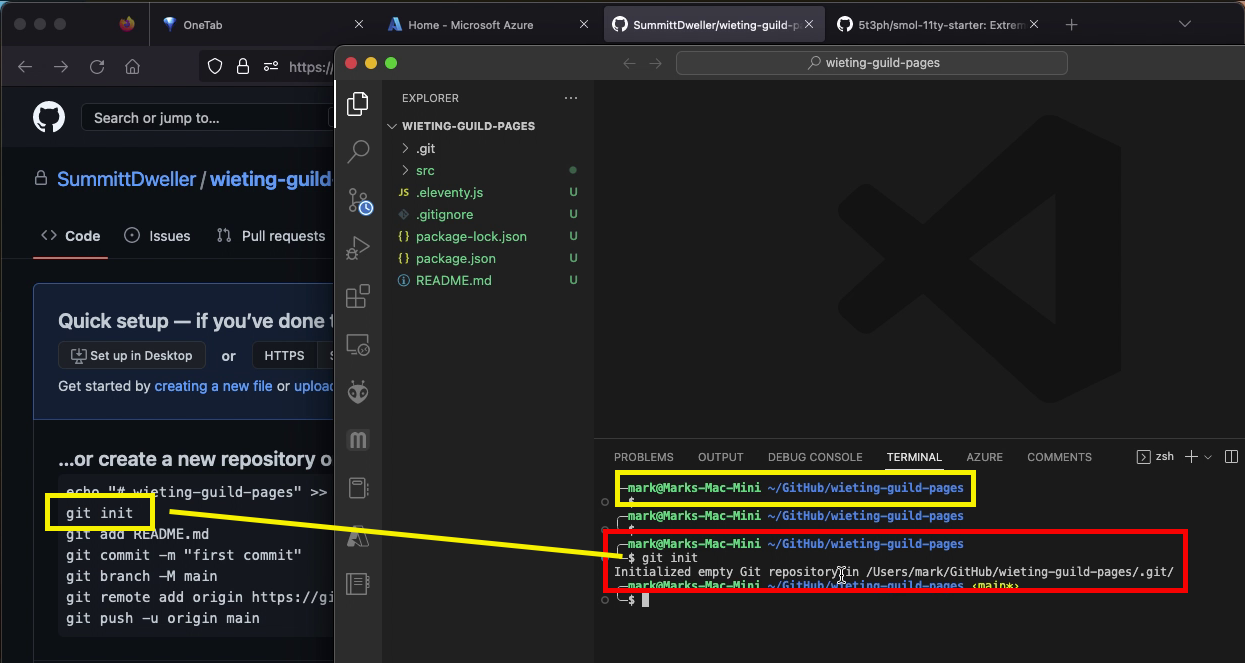
From the project’s VSCode terminal I executed the commands as instructed by the new GitHub repo window, beginning with git init.
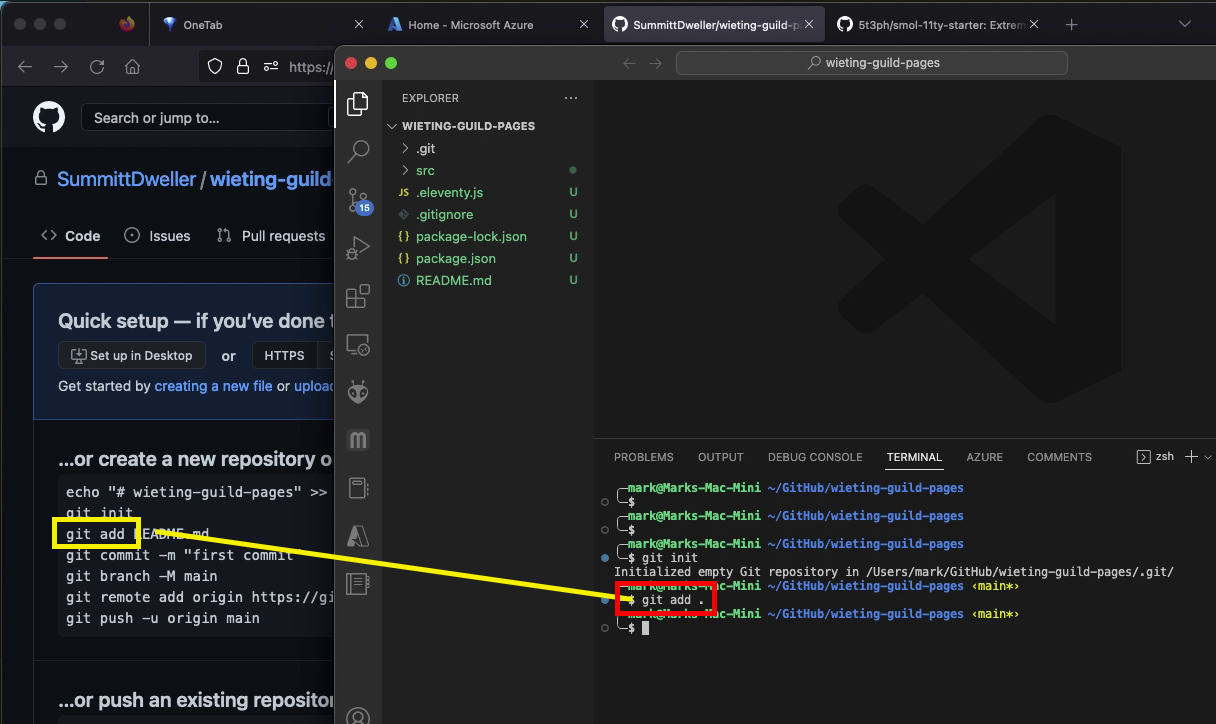
Then git add . instead of git add README.md as instructed. I do this to add ALL of the project files to staging becase we need to commit everything, not just the README.md file.
Next, I copied and pasted the remaining commands from the instructions into the terminal. The complete command block includes:
git commit -m "first commit"
git branch -M main
git remote add origin https://github.com/SummittDweller/wieting-guild-pages.git
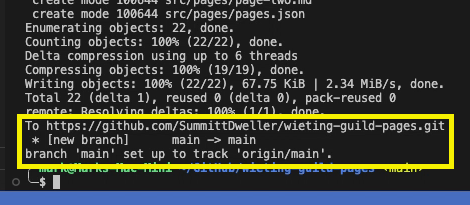
git push -u origin main
The terminal should respond with output like you see in Figure 13 below.
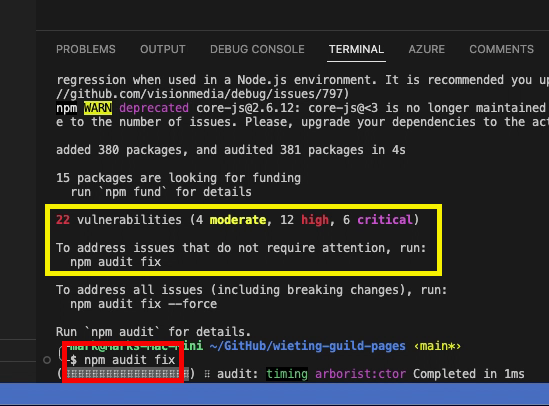
Now it was time to make an initial build and run the starter project as instructed in step 2 of the project’s Quick Start instructions.

My install detected a number of vulnerabilities, presumably because of the starter project’s age, so I followed the advice provided in the npm install output and ran a npm audit fix command as you see below.
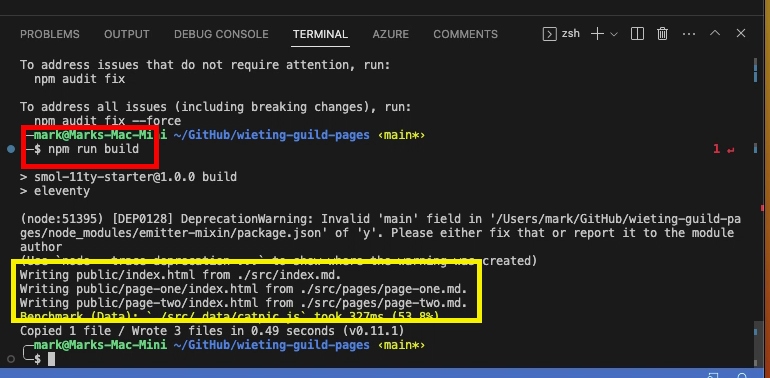
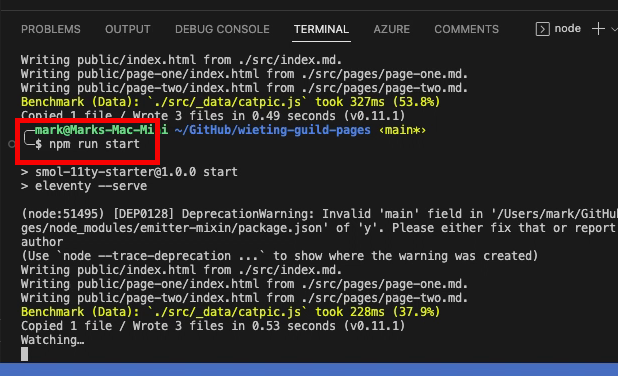
Next, continuing the starter project’s quick start instructions I executed npm run build to build our first instance of the 11ty project. Note in the output that the command is building the 11ty site in the public directory. This information will be needed later in the process.
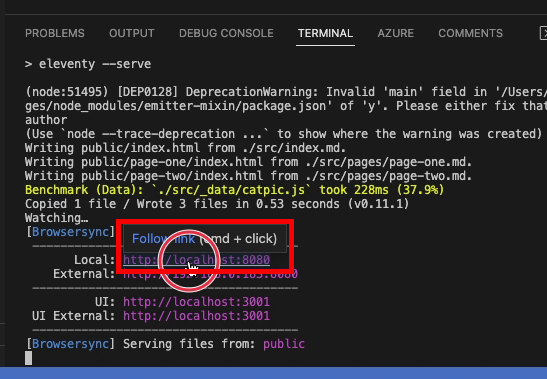
Since the build was a success I continued with the quick start by running npm run start to launch a local instance of the site. As you see in Figure 18, the local site becomes available in our web browser at http://localhost:8080 and multiple links to visit the site are provided.
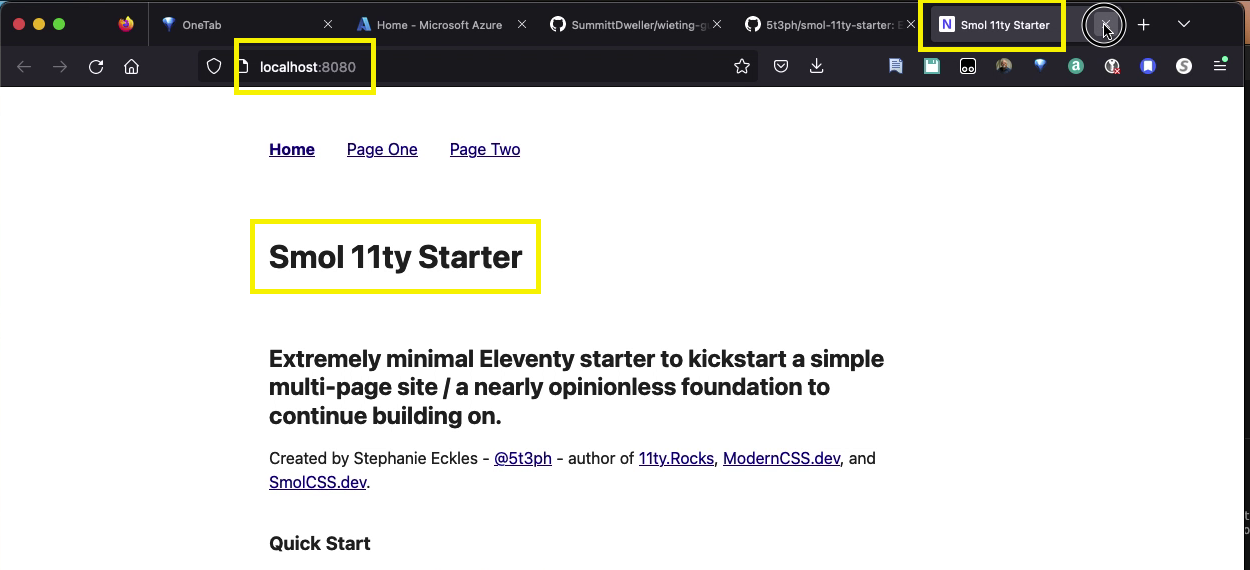
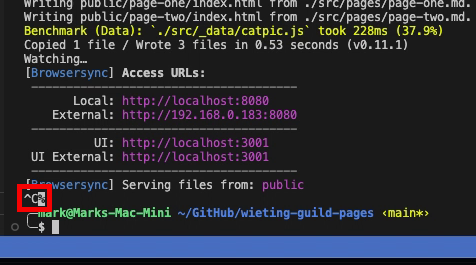
Our inital local site is now visible in our browser, and it looks good! I used CTRL-C in the VSCode terminal to stop the local site as you see in Figure 20 below.
Creating the Azure Static Web App
Next, I returned to my Azure portal to create a new Azure Static Web App from our new repo. The process begins by navigating a browser window to the Azure portal and Azure services, Static Web Apps, and + Create as shown below in Figure 21.

I gave my web app a name, in this case wieting-guild-pages, which matches the name of my GitHub repo. Matching these names is recommended, but NOT a requirement! Other parameters of the app are as shown in Figure 22 below.
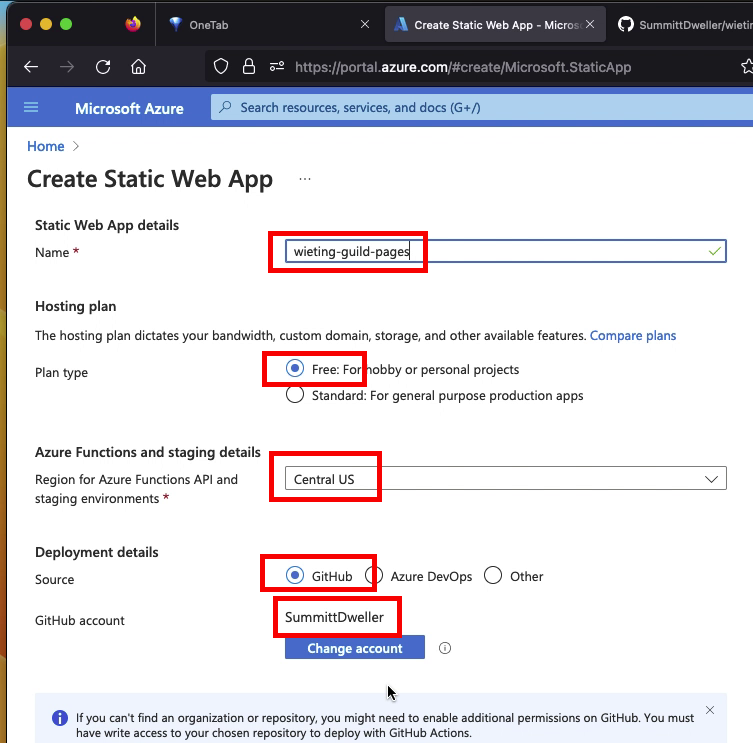
In the lower half of the Create Static Web App screen the required selections for Organization, Repository, Branch and Build presents are as shown in Figure 23. Leave the default values for App location and Api location, and specify an Output location of public. You may recall that in Figure 16 we saw that public is the name of the folder where the 11ty site is built.
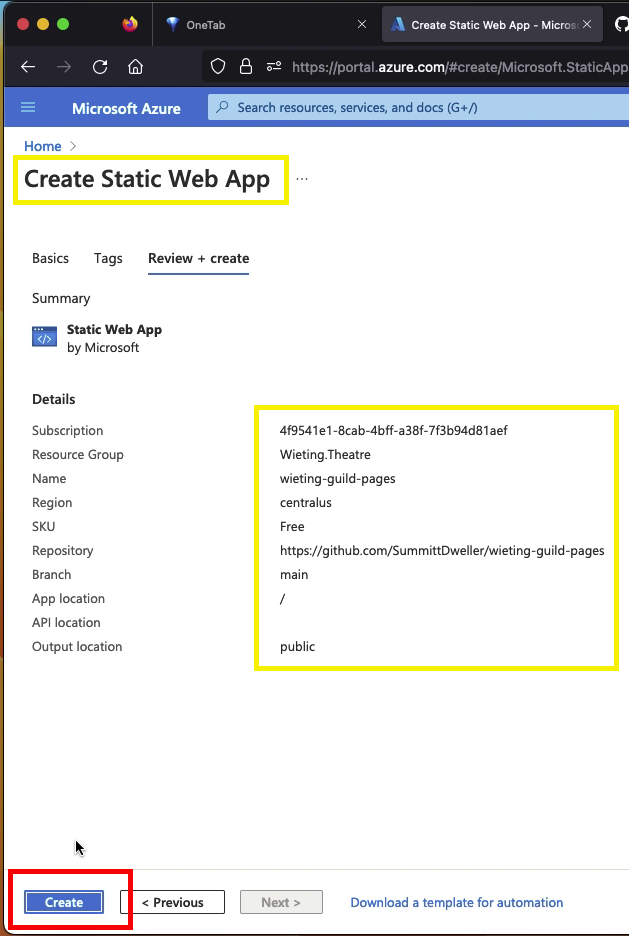
Click Review + create to proceed.

The Azure window should change to reflect that the new app is being validated and the Create button in the lower-left corner becomes available once validation is complete. Clicking the Create button shown in Figure 24 starts the creation and deployment process.
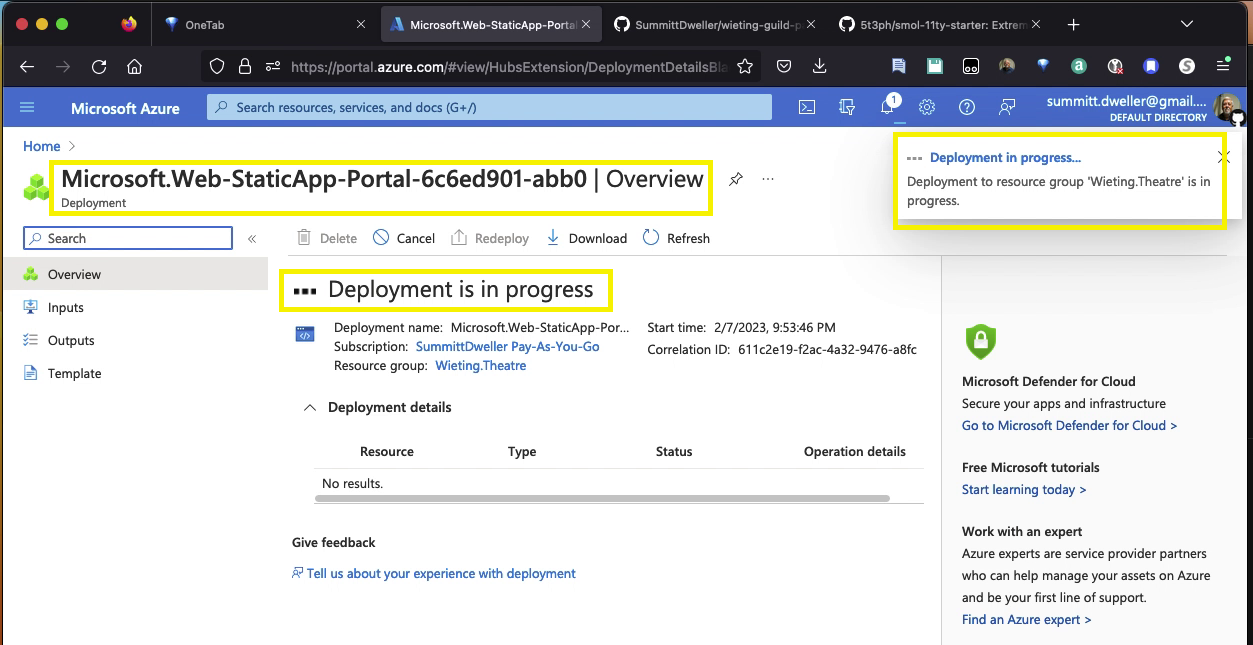
The Azure portal screen for the new app shows ...Deployment is in progress. The deployment could take a minute or two.
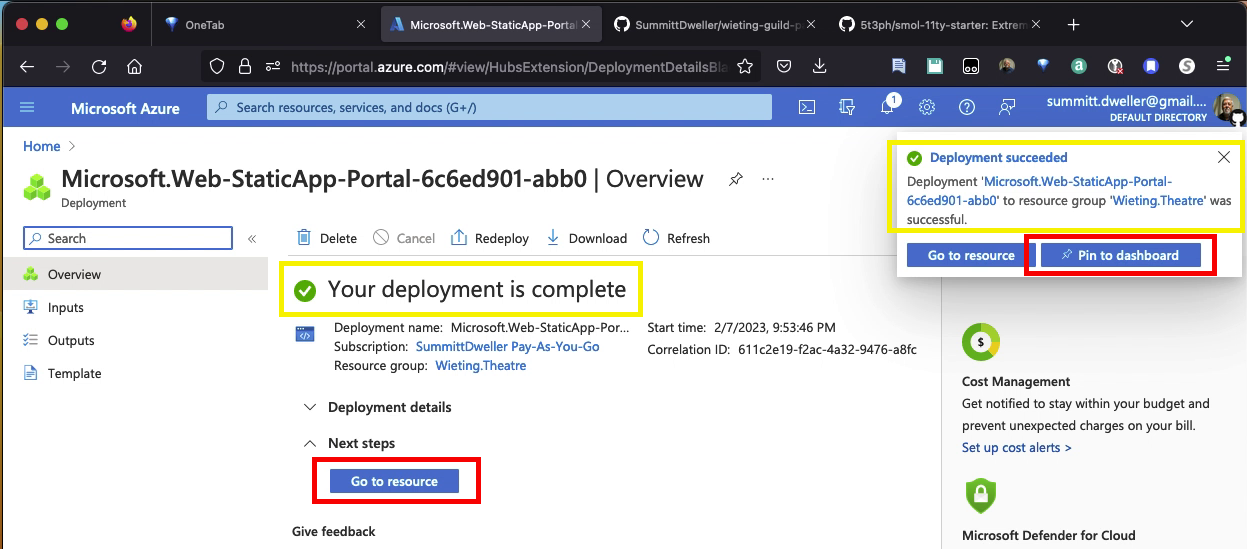
Once the initial deployment is complete the window will change to indicate the progress. An option to Pin to dashboard is displayed and I recommend doing so. Then click Go to resource.
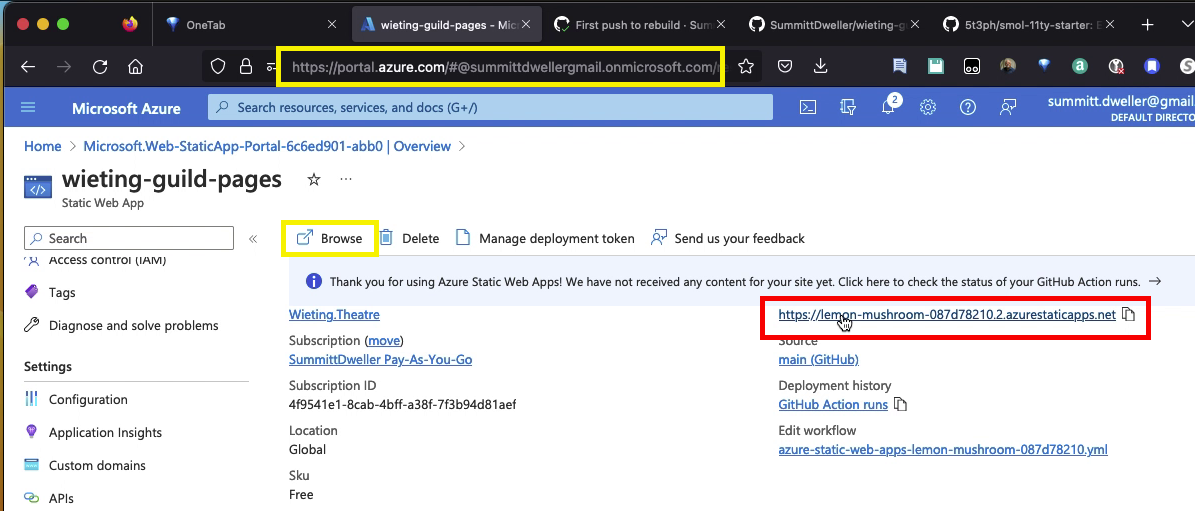
Go to resource opens the app’s overview page where you should see key information as marked with yellow boxes in Figure 27 below. Use the URL link on the right to open the new Azure web app site in your browser.

The site should open in your browser but it may not display any content. Instead you may see a warning page indicating that the site/app is ready, but has no content. This is because the initial deployment of the app wasn’t preceeded by an npm build command. To force a rebuild you should visit the local project in VSCode, make a change to some piece of content, and commit/push that change to GitHub. Each time you complete a change sequence like that the GitHub Action that was created earlier (see the Edit workflow link in Figure 27 above) will automatically build and re-deploy the app.
Pushing Changes to Rebuild the Site
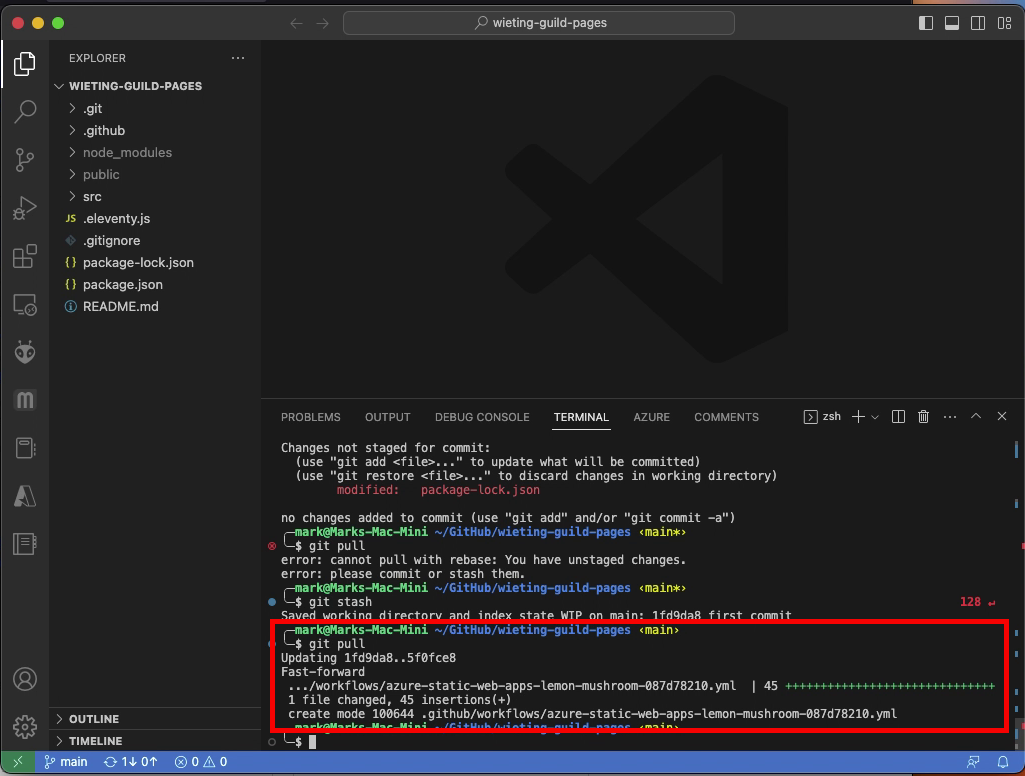
I began this part of the workflow by returning to my VSCode project terminal where I did a git pull command to update the local repo with any remote changes. This should pull in one critical addition to the project, the GitHub Action workflow .yml file as you can see in Figure 28 below.
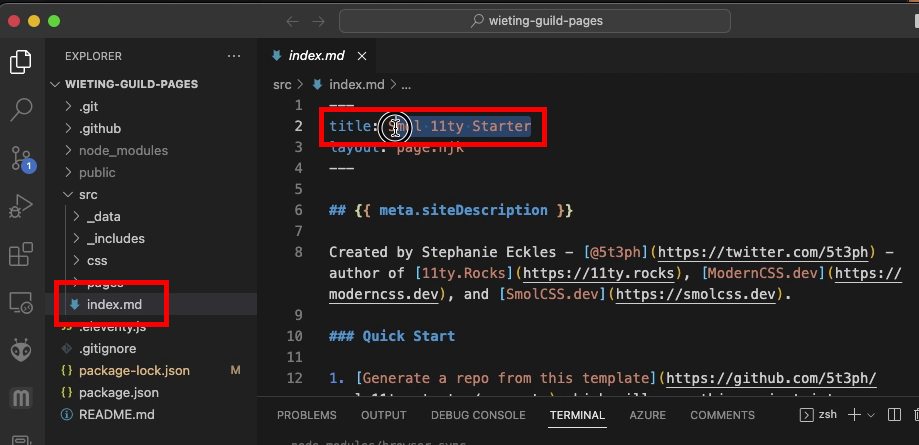
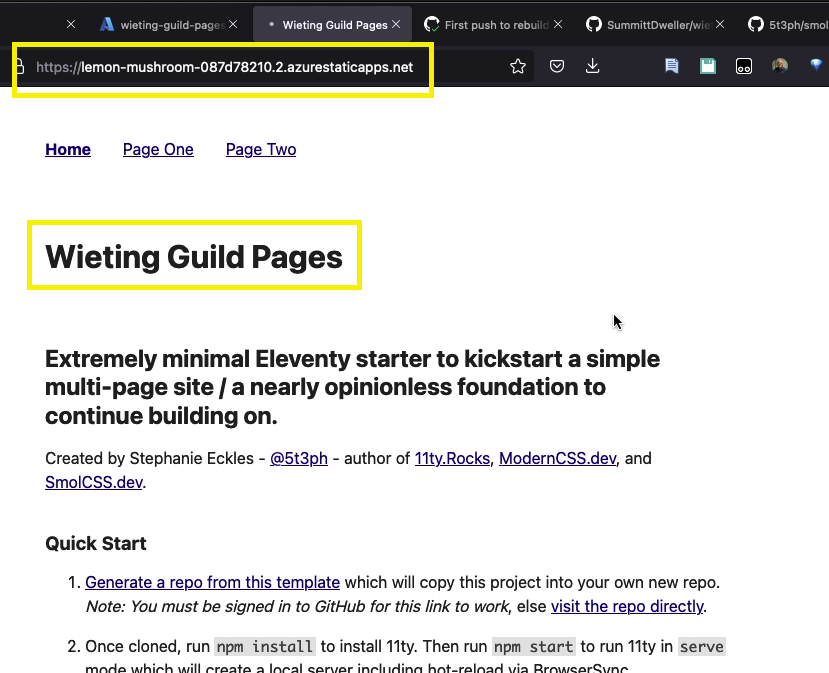
I choose to open the index.md file in the project’s ./src directory – this is essentially the site’s “home” page as markdown content – where I changed the original title to “Wieting Guild Pages”.
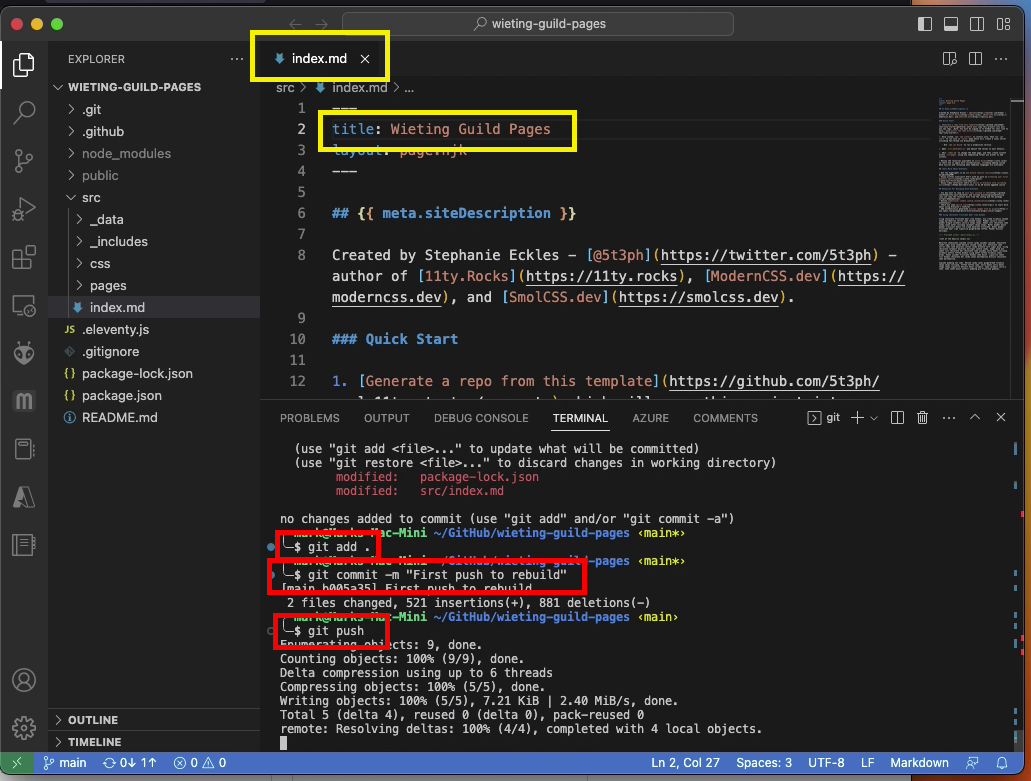
With the change completed I moved into the VSCode terminal for a typical git add ., git commit -m... and git push command sequence as shown in Figure 30 below.
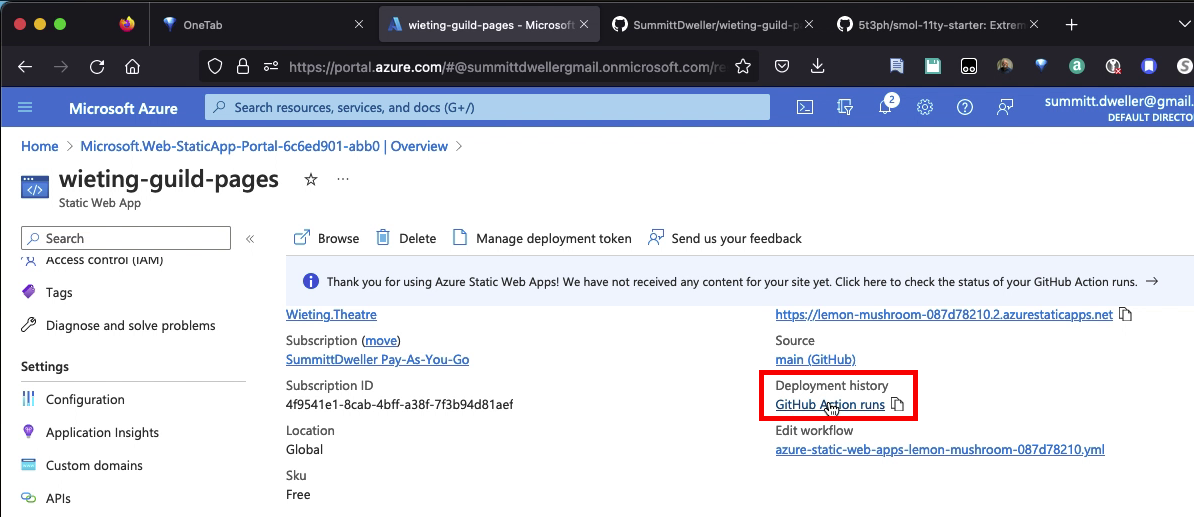
I immediately switched back to my Azure app’s overview screen where I clicked on the GitHub Action runs link under Deployment history. That opens a window showing the GitHub project’s Actions tab where a spinning yellow dot in front of the commit name (in this case it was First push to rebuild) indicates that the GitHub Action workflow is underway.
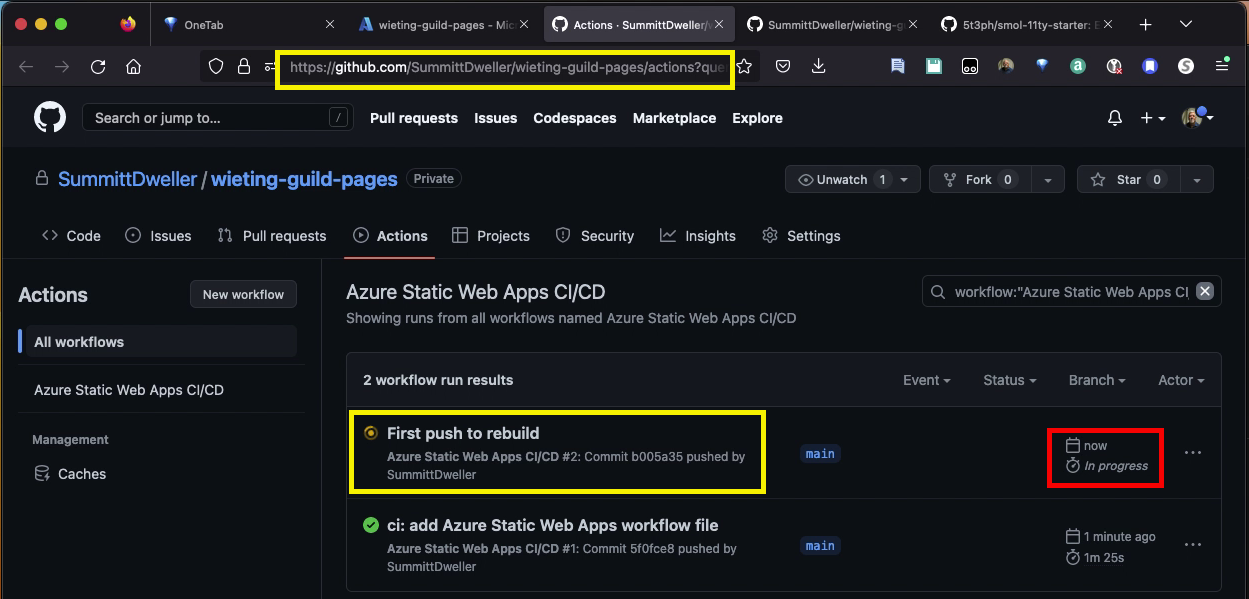
When the yellow spinning dot turns to a green checkmark, as you see in Figure 33, the GitHub Action is complete and was a success.

Now, returning to the app’s Azure overview shows a Browse button and an address/link to the newly deployed site on the right. Clicking either of these elements should open the new site.
The edits shown previously in Figure 30 should now be visible in the updated site. Huzzah! 🎉
I hope you find portions of this very detailed post to be useful. I’m sure there will soon be some follow-up to this, but for this installment… That’s a wrap!